
Laravel 9 Flash Message Example Tutorial
https://www.itsolutionstuff.com/post/laravel-9-flash-message-example-tutorialexample.html
Hi,
This article is focused on laravel 9 flash message example. you will learn how to implement flash message in laravel 9. Here you will learn laravel 9 flash message from the controller. This tutorial will give you a simple example of laravel 9 flash message notification.
we will define various types of flash message notifications like alert-success, alert danger, alert info, alert warning messages in bootstrap laravel 9 projects. When you have a success task on the controller method then you can use a success flash message, if you have any error task then you can use error flash message.
Flash messages are required in laravel 9 application because that way we can give alter with what progress is complete, error, warning, etc. In this tutorial, I added several ways to give a flash message like redirect with a success message, redirect with an error message, redirect with a warning message, and redirect with info message. In this example, we use a bootstrap flash alert layout that way it becomes a good layout.
So, you have to just follow the basic three-step to integrate flash messages in your laravel 9 application. So let's follow the below step:
Step 1: Create Global File For Flash Message
In first step we will create new blade file flash-message.blade.php. In this file we will write code of bootstrap alert and check which messages come.
There are following alert will added:
1)success
2)error
3)warning
4)info
5)validation error
So, let's create flash-message.blade.php file and put bellow code on that file.
resources/views/flash-message.blade.php
Step 2: Use Flash Message in Theme
In this step we have to just include flash-message.blade.php file in your theme default file. You have to just include this flash file in your default theme blade file like as bellow:
You can also see i added flash file on my theme, so you can add that way. Let's see bellow example:
resources/views/layouts/app.blade.php
Read Also: Laravel 9 PDF | Laravel 9 Generate PDF File using DomPDF
Step 3: Use Flash Messages with Redirect
In this step we will learn how to give message when you redirect one by one:
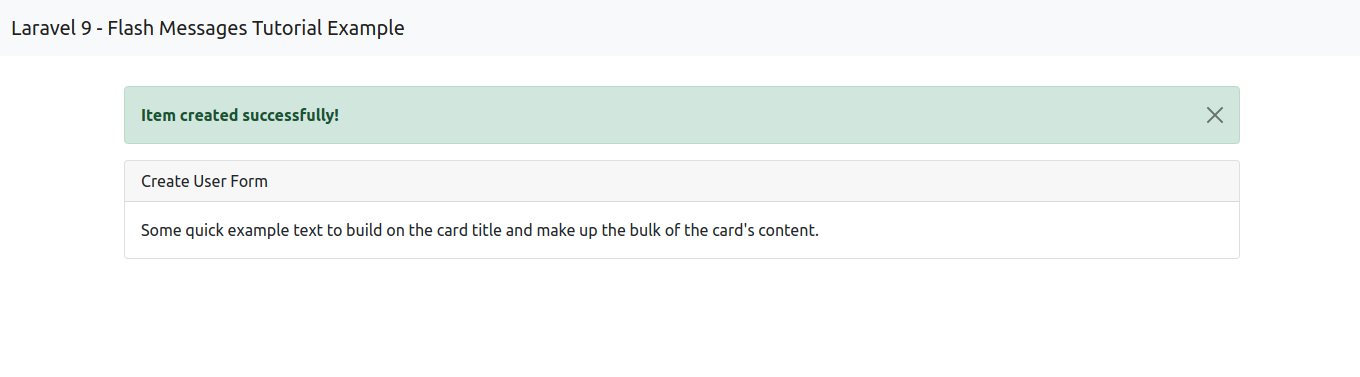
1. Redirect with success message
 We can simple redirect route or redirect url or redirect back with success flash message, we can use in controller like this way:
You can get layout of success flash message:
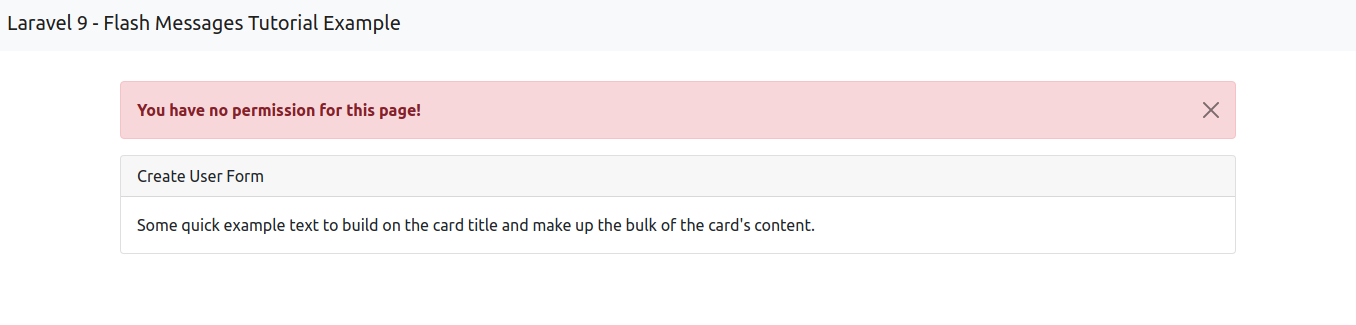
2. Redirect with error message
We can simple redirect route or redirect url or redirect back with error flash message, we can use in controller like this way:
You can get layout of error flash message:
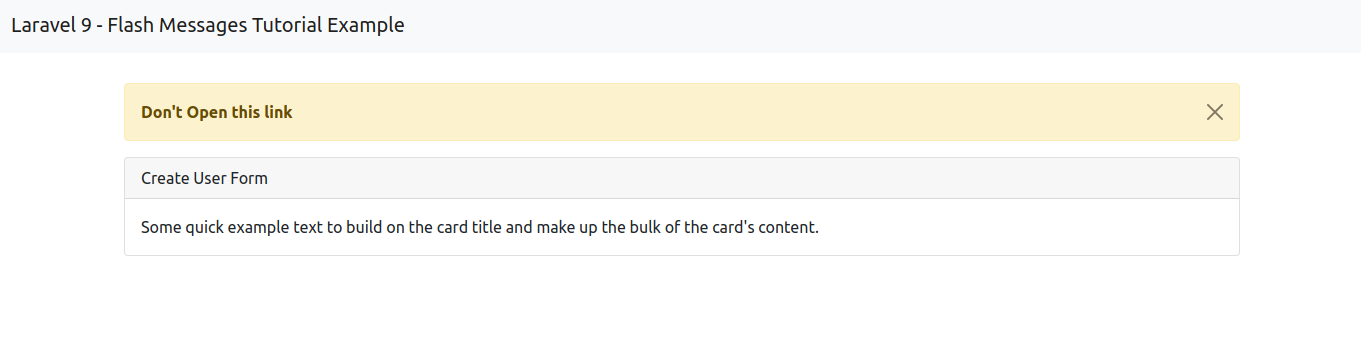
3. Redirect with warning message
We can simple redirect route or redirect url or redirect back with warning flash message, we can use in controller like this way:
You can get layout of warning flash message:
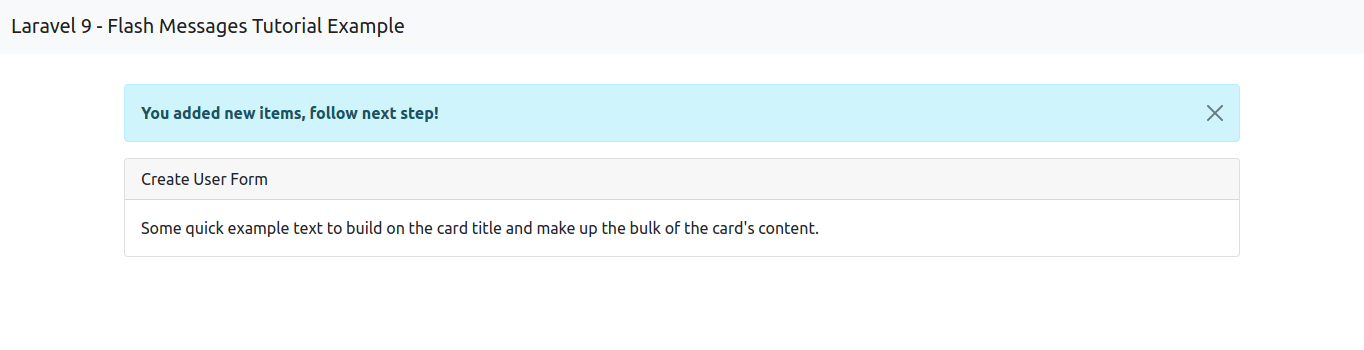
4. Redirect with info message
We can simple redirect route or redirect url or redirect back with info flash message, we can use in controller like this way:

You can get layout of info flash message:
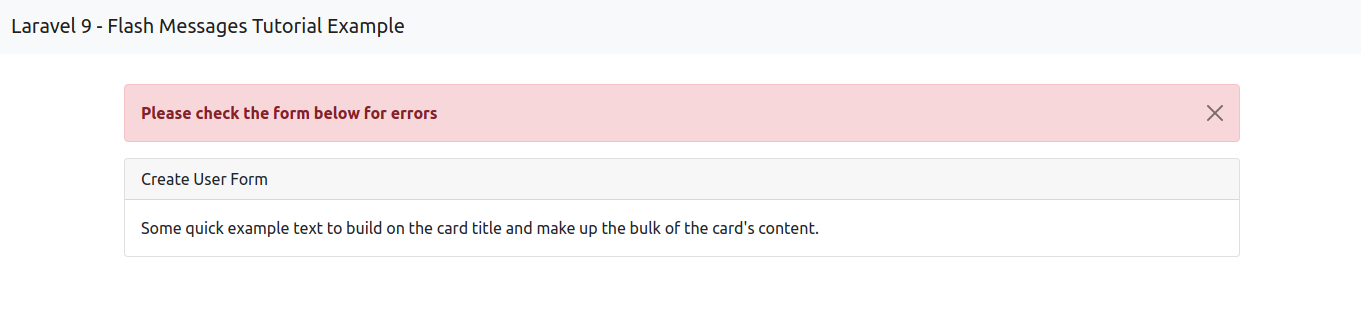
5. Validation Error
If you use laravel 5 validation then you will redirect back with errors automatically, At that time it will also generate error flash message.
Read Also: Laravel 9 Queues: How to Use Queue in Laravel 9?
You can get layout of error flash message:
This way you can simple implement flash message in your laravel 9 application.
I hope it can help you....
Last updated