
Laravel Telescope Installation and Configuration Tutorial (ok)
https://www.itsolutionstuff.com/post/laravel-telescope-installation-and-configuration-tutorialexample.html
<!DOCTYPE html>
<html lang="{{ str_replace('_', '-', app()->getLocale()) }}">
    <head>
        <meta charset="utf-8">
        <meta name="viewport" content="width=device-width, initial-scale=1">

        <title>Laravel</title>

        <!-- Fonts -->
        <link href="https://fonts.googleapis.com/css2?family=Nunito:wght@400;600;700&display=swap" rel="stylesheet">

        <!-- Styles -->
        <style>
            /*! normalize.css v8.0.1 | MIT License | github.com/necolas/normalize.css */html{line-height:1.15;-webkit-text-size-adjust:100%}body{margin:0}a{background-color:transparent}[hidden]{display:none}html{font-family:system-ui,-apple-system,BlinkMacSystemFont,Segoe UI,Roboto,Helvetica Neue,Arial,Noto Sans,sans-serif,Apple Color Emoji,Segoe UI Emoji,Segoe UI Symbol,Noto Color Emoji;line-height:1.5}*,:after,:before{box-sizing:border-box;border:0 solid #e2e8f0}a{color:inherit;text-decoration:inherit}svg,video{display:block;vertical-align:middle}video{max-width:100%;height:auto}.bg-white{--bg-opacity:1;background-color:#fff;background-color:rgba(255,255,255,var(--bg-opacity))}.bg-gray-100{--bg-opacity:1;background-color:#f7fafc;background-color:rgba(247,250,252,var(--bg-opacity))}.border-gray-200{--border-opacity:1;border-color:#edf2f7;border-color:rgba(237,242,247,var(--border-opacity))}.border-t{border-top-width:1px}.flex{display:flex}.grid{display:grid}.hidden{display:none}.items-center{align-items:center}.justify-center{justify-content:center}.font-semibold{font-weight:600}.h-5{height:1.25rem}.h-8{height:2rem}.h-16{height:4rem}.text-sm{font-size:.875rem}.text-lg{font-size:1.125rem}.leading-7{line-height:1.75rem}.mx-auto{margin-left:auto;margin-right:auto}.ml-1{margin-left:.25rem}.mt-2{margin-top:.5rem}.mr-2{margin-right:.5rem}.ml-2{margin-left:.5rem}.mt-4{margin-top:1rem}.ml-4{margin-left:1rem}.mt-8{margin-top:2rem}.ml-12{margin-left:3rem}.-mt-px{margin-top:-1px}.max-w-6xl{max-width:72rem}.min-h-screen{min-height:100vh}.overflow-hidden{overflow:hidden}.p-6{padding:1.5rem}.py-4{padding-top:1rem;padding-bottom:1rem}.px-6{padding-left:1.5rem;padding-right:1.5rem}.pt-8{padding-top:2rem}.fixed{position:fixed}.relative{position:relative}.top-0{top:0}.right-0{right:0}.shadow{box-shadow:0 1px 3px 0 rgba(0,0,0,.1),0 1px 2px 0 rgba(0,0,0,.06)}.text-center{text-align:center}.text-gray-200{--text-opacity:1;color:#edf2f7;color:rgba(237,242,247,var(--text-opacity))}.text-gray-300{--text-opacity:1;color:#e2e8f0;color:rgba(226,232,240,var(--text-opacity))}.text-gray-400{--text-opacity:1;color:#cbd5e0;color:rgba(203,213,224,var(--text-opacity))}.text-gray-500{--text-opacity:1;color:#a0aec0;color:rgba(160,174,192,var(--text-opacity))}.text-gray-600{--text-opacity:1;color:#718096;color:rgba(113,128,150,var(--text-opacity))}.text-gray-700{--text-opacity:1;color:#4a5568;color:rgba(74,85,104,var(--text-opacity))}.text-gray-900{--text-opacity:1;color:#1a202c;color:rgba(26,32,44,var(--text-opacity))}.underline{text-decoration:underline}.antialiased{-webkit-font-smoothing:antialiased;-moz-osx-font-smoothing:grayscale}.w-5{width:1.25rem}.w-8{width:2rem}.w-auto{width:auto}.grid-cols-1{grid-template-columns:repeat(1,minmax(0,1fr))}@media (min-width:640px){.sm\:rounded-lg{border-radius:.5rem}.sm\:block{display:block}.sm\:items-center{align-items:center}.sm\:justify-start{justify-content:flex-start}.sm\:justify-between{justify-content:space-between}.sm\:h-20{height:5rem}.sm\:ml-0{margin-left:0}.sm\:px-6{padding-left:1.5rem;padding-right:1.5rem}.sm\:pt-0{padding-top:0}.sm\:text-left{text-align:left}.sm\:text-right{text-align:right}}@media (min-width:768px){.md\:border-t-0{border-top-width:0}.md\:border-l{border-left-width:1px}.md\:grid-cols-2{grid-template-columns:repeat(2,minmax(0,1fr))}}@media (min-width:1024px){.lg\:px-8{padding-left:2rem;padding-right:2rem}}@media (prefers-color-scheme:dark){.dark\:bg-gray-800{--bg-opacity:1;background-color:#2d3748;background-color:rgba(45,55,72,var(--bg-opacity))}.dark\:bg-gray-900{--bg-opacity:1;background-color:#1a202c;background-color:rgba(26,32,44,var(--bg-opacity))}.dark\:border-gray-700{--border-opacity:1;border-color:#4a5568;border-color:rgba(74,85,104,var(--border-opacity))}.dark\:text-white{--text-opacity:1;color:#fff;color:rgba(255,255,255,var(--text-opacity))}.dark\:text-gray-400{--text-opacity:1;color:#cbd5e0;color:rgba(203,213,224,var(--text-opacity))}.dark\:text-gray-500{--tw-text-opacity:1;color:#6b7280;color:rgba(107,114,128,var(--tw-text-opacity))}}
        </style>
    </head>
    <body class="antialiased">
        <div class="relative flex items-top justify-center min-h-screen bg-gray-100 dark:bg-gray-900 sm:items-center py-4 sm:pt-0">
            @if (Route::has('login'))
                <div class="hidden fixed top-0 right-0 px-6 py-4 sm:block">
                    @auth
                        <a href="{{ url('/home') }}" class="text-sm text-gray-700 dark:text-gray-500 underline">Home</a>
                    @else
                        <a href="{{ route('login') }}" class="text-sm text-gray-700 dark:text-gray-500 underline">Log in</a>

                        @if (Route::has('register'))
                            <a href="{{ route('register') }}" class="ml-4 text-sm text-gray-700 dark:text-gray-500 underline">Register</a>
                        @endif
                    @endauth
                </div>
            @endif

            <div class="container">
                <div class="row">
                    Test
                </div>
            </div>
        </div>
    </body>
</html>


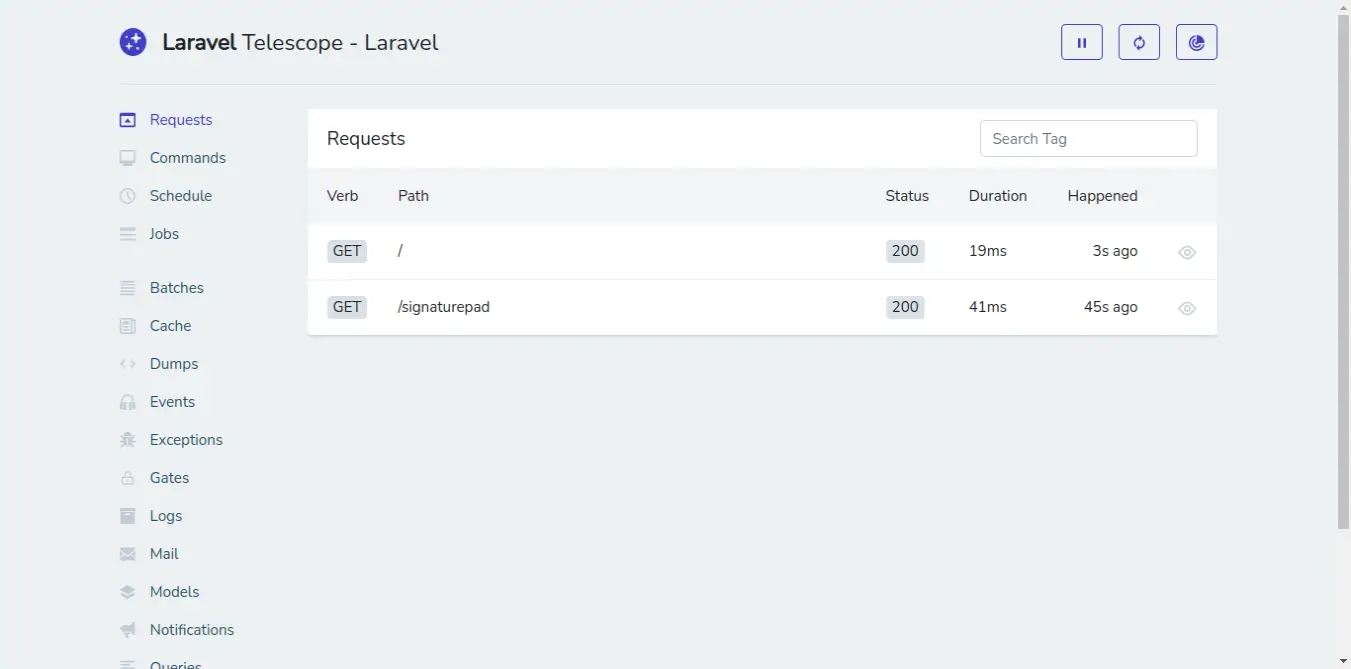
Laravel Telescope Installation and Configuration Tutorial
By Hardik Savani January 8, 2021 Category : Laravel PlayUnmuteLoaded: 1.17%Fullscreen
 Hello Dev,
PreviousLaravel Global Scope Tutorial Example (ok)Next=== END thêm một ràng buộc vào tất cả các truy vấn tới model ===
Last updated